
Of late, you’ve probably spotted flaylays gracing blogs and adorning Instagram feeds in abundance. When was it last that you spotted one of those hoardings displaying a well-shot advertisement? In today’s visual world, it’s frequency ought to be much lower than that of an ecommerce web advertisement you’ve been glancing through several times a day while surfing Instagram or Twitter. The term Flatlay is probably a bit of a recent addition to your vocabulary, something that was unheard-of maybe a year ago.
FLATLAYS have taken center stage and swept most other genres of the product photography segment and emerged as the supreme still-life genre in recent times. With e-commerce taking the Lion’s share of the sales in these times, most product companies look to optimize the web appeal of their products.
Let me clear the air by pronouncing once more as to what a Flatlay is. A flatlay is a sub-genre of still life photography with a bird’s eye shot of the product, distinctively set up with appeasing props. The minimalistic staging and bird’s eye perspective are considered the defining traits of a flatlay, simply making the picture and product stand out elusively. However, the style seems to have evolved over time, with photographers playing with various other angles to get the best shot.
Here’s a quick guide to up your flatlay game:
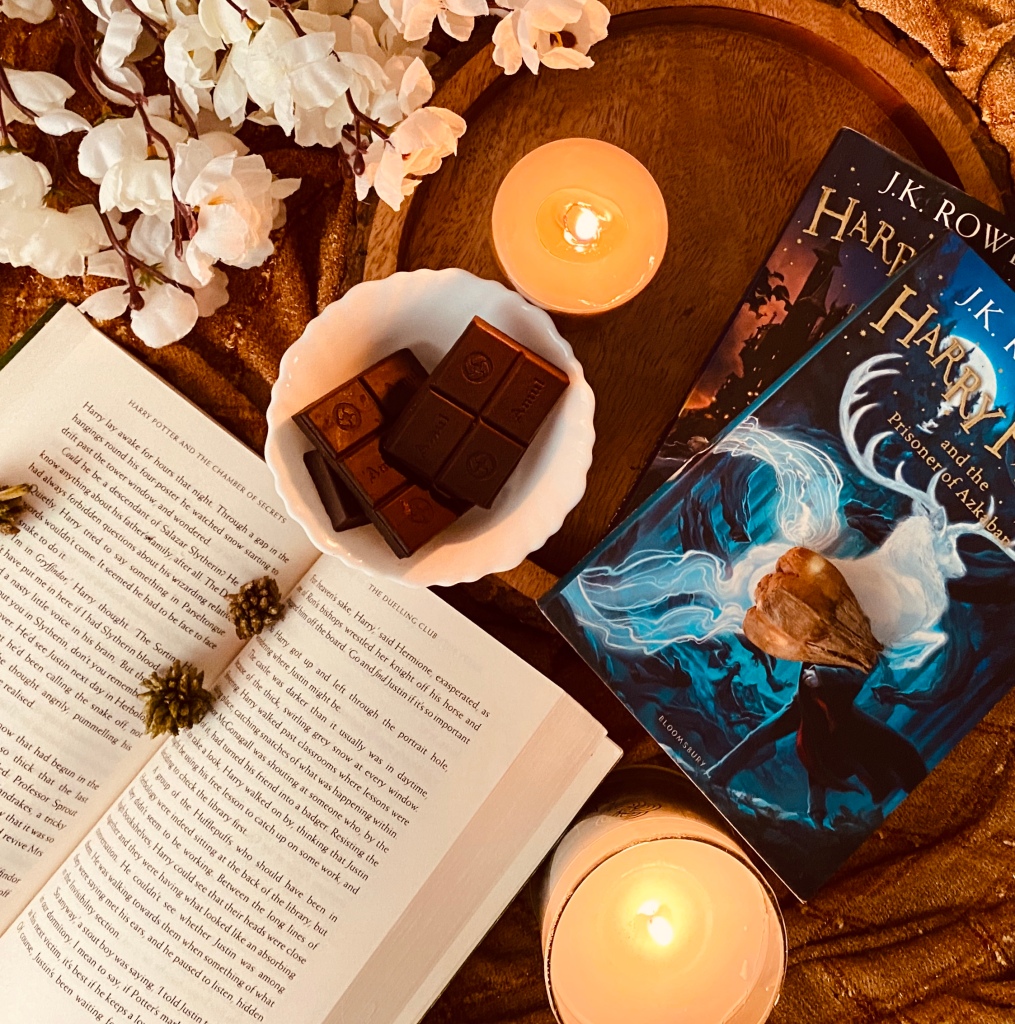
1. Decide on a Theme: Each flatlay unfolds a story. Ideation of a theme or a story is the first and most integral part of capturing an eye-candy flatlay. Every flatlay hvas a story to tell. Your theme could be a product, food, color, occasion and so on- sky is the limit. You could start with a basic coffee flatlay- an absolutely simple one to start with. Coffee and books are a quintessential part of flatlays. A coffee with a gorgeous rosette and few basic props is an absolute handsdown win win formula.
2. Pick Colors and Props: Once you’ve zeroed down on a theme, it’s time to pick the props. Always keep in mind that a flatlay color scheme should not have more than two or three colours. Limiting the color palette makes it more appeasing and ensures each of the props stand out distinctively.
When it comes to picking props, ensure that each of them are related to your center product and weave a story. For instance, if you choose books as your theme, make sure you pick props- flowers, candles, books, potpourri within those two to three colors you have zeroes down on.

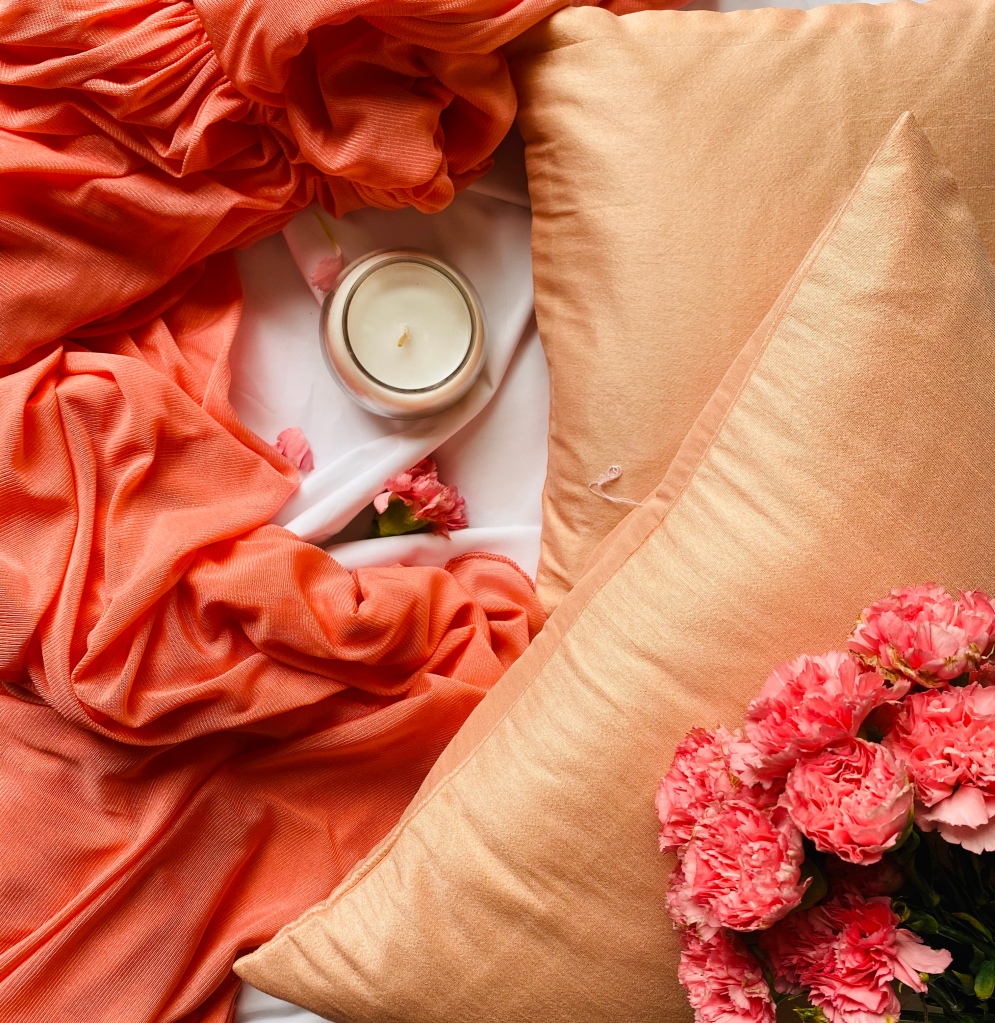
3. Use of textures:
Layering your flatlays with textures adds essence to the picture. The textures could be as basic as comforters, stoles, crochette tablecovers, within the same color scheme. Layering is a great way to add depth to your flatlays, in case they appear too flay. Addition of multiple layers using crumpled paper, linen or something as basic a towel creates an intrigue.

4. Arranging the props:
Arranging props is a vital part of clicking a flatlay. In this journey of photographing unique flatlays, I have learnt that the hardest job is to conceptualize, create, layout and arrange a perfect flatlay. The simplest job is to click one. Once you’ve learnt the knack of arranging a flatlay, you’re more than half way through.
Start with placing the largest object first. You could go for a Grid Flatlay initially, with objects placed angularly. Once you’ve arranged your props, try filling up negatives spaces with handy potpourri. Avoid placing all objects at the center.
5. The ‘Overflow” Concept:
Objects overflowing out of the flatlay, giving an impression that you’re probably seeing a snippet of a larger picture appeals to the eye and engages the viewer’s imagination to think beyond the frame. Placing all objects in one corner works as well. This is especially true when it comes to shooting a food flatlay. Capturing angular shots isn’t required, you could photograph a full picture and crop later to fit your needs.

6. Chip In Some Real-Life Elements:
Using real life objects adds essence and motion to your flatlay. Well manicured hands are a gorgeous addition to the picture. Besides, adding a fern, a money plant creeping into the picture, or some fresh flowers-all these ensure your flatlay spells out perfection.
When shooting books or coffee, ask a child or young adult to bend over slightly, as if they were reading or engaging in a coffee treat and then shoot with the objects and the model in focus.
7. Choose your backdrop carefully:
Choose your base or backdrop carefully. White is an excellent base or backdrop for most flatlays, it makes your props or products pop up exclusively. Avoid a base with prints or designs.
8. Upgrade your lens:
And while mobile photography has evolved, with the best of lenses available to shoot elusive shots, none can replace a pro camera lens. A professional camera helps capture details and smaller objects better.
9. Harness the Power of Natural Light:
This is a constant reiteration-Harness the power of daylight. Shooting in a set up with controlled natural light can make a world of difference. Like I said above, shooting on a cloudy day can give you some wonder shots you would rarely be able to get otherwise!
Hope you can capture some eye catching Flatlays with these tips and tricks. Here’s to shooting more Flatlays and it’s variations in the future!

Great work!! Loved the breakdown and covering of all the aspect.
LikeLike
❣️🤗
LikeLike
Thankyou
LikeLiked by 1 person